这是关于结合使用FastReport.Net和PHP应用程序的文章的最后一部分。
在以前的文章(查看第1部分、第2部分)中,我们研究了在ASP.Net Core上创建服务器部件的方法。让我提醒您,它使您可以获取报表显示,将报表加载到其中以进行编辑的报表设计器显示,以给定格式下载报表。
现在我们必须实现一个php应用程序。为此,您必须安装Web服务器,例如,在其上安装了Apache和PHP。
在本文中,我们将不重复赘述创建php应用程序的原理。
让我们确定页面的结构。我们需要3个网页模板:
主页——显示网络报表;
设计器——显示报表设计器;
下载——按钮以下载报表。
每个页面的菜单标题都相同。因此,将其放在单独的文件header.php中是有意义的。让我们在预安装的Apache目录的htdocs文件夹中创建它。
<div id="header">
 <div >
 <h1>FastReports</h1>
 <ul >
 <li><a href="index.php">Home</a></li>
 <li ><a href="designer.php">Designer</a></li>
 <li ><a href="downloads.php">Downloads</a></li>
 </ul>
 </div>
 </div>
同样,在每个页面上,将有一个包含报表和操作按钮的下拉列表。此模块也移至单独的文件——报表列表:
<?php
$info = file_get_contents('https://localhost:44346/api/reports/');
 $res = json_decode($info, true);
?>
<div id="dropdown">
 <select name="reports" id="reports" >
 <?php
 foreach ($res as $key => $value) {
 echo '<option value='.$key.'>'.$value['reportName'].'</option>';
 }
 ?>
 <input type="button" name="submit" value="Get" onclick=get()'>
</div>
这使用内容检索方法以json格式加载报表列表。该链接指向本地调试iis文件,在该文件中“引发”了我们的服务器部分。接下来,使用php代码,我们使用从服务器接收到的数据填写下拉列表。获取“Get”按钮启动选定的()函数,该函数在每个页面上都是唯一的。
众所周知,通常index.php文件用于网站的主页。让我们来创建它。
<html>
<head>
 <meta http-equiv="content-type" content="text/html; charset=utf-8" />
 <title>FastReports</title>
 <meta name="title" content="FastReports" />
 <link rel="stylesheet" href="stylesite.css" type="text/css" media="screen, projection" />
</head>
<body>
 <div id="main">
 <?php
 include ("header.php");
 ?>
 <?php
 include ("reportslist.php");
 ?>

 <script type="text/javascript" language="javascript">
 function get(){
 var name = document.getElementById('reports').options[document.getElementById('reports').value].text
 document.getElementById('forFrame').innerHTML = '<iframe id="frame" src="https://localhost:44346/api/reports/ShowReport?name='+name+'" width="1000" height="1000" />';
 };
 </script>
 <div id="forFrame"></div>
 </div>
</body>
</html>
该页面模板包括标题和正文。通常,标题包括标题、元数据、样式链接。在页面的正文中,我们包含了带有标题和下拉列表的文件。请记住,reportslist.php模块中的获取“Get”按钮调用了Get ()函数。
让我们考虑在javascript中实现此功能。首先,您需要获取所选报表的名称,然后在后端调用ShowReport方法时将其作为参数传递。要加载外部对象(WebReport),我们将使用iframe标签。JavaScript再次帮助我们在<div>标签内动态插入ifame。在到源的链接中,我们使用了一个变量——报表的名称。
样式表也是相当简单的stylesite.css:
* {
 margin: 0;
 padding: 0;
}
#main{
 background-color:#fff;
 width: 1000px;
 margin:0 auto;
 overflow:hidden;
}
#header {
 height:70px;
 background-color: #FFCC33;
 text-align: center;
}
#header li {
 list-style: none;
 display: inline;
 padding: 10px 20px 0px 10px;
}
#header li a {
 padding:3px;
 text-decoration: none;
 color: #000;
}
#header li a:hover {
 text-decoration: none;
 padding:3px;
 text-decoration: none;
 color: red;
}
#header H1 {
 font-family: Times, Tahoma, Arial,Verdana, sans-serif;
}
#dropdown {
 padding: 5px;
}
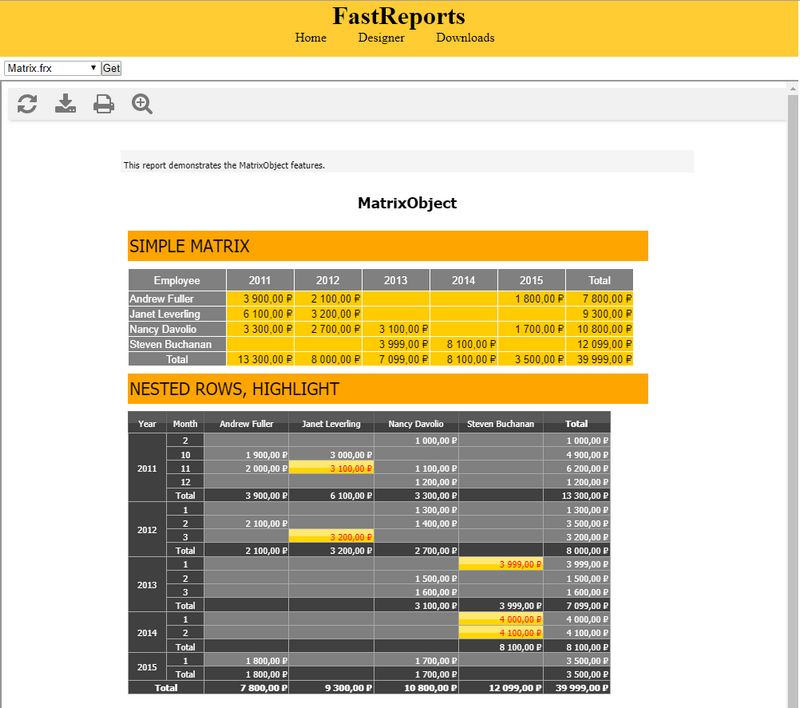
让我们启动我们的Web服务器并查看索引页面:

我们有一个下拉列表和一个按钮。选择报表并按下按钮:

结果,我们得到一个Web报表对象。此外,工具栏上的按钮没有丢失功能,您可以导出为所需的格式并进行打印。
现在,我们实现Dedigner.php页面。使用index.php在同一目录中创建它:
<html>
<head>
 <meta http-equiv="content-type" content="text/html; charset=utf-8" />
 <title>FastReports</title>
 <meta name="title" content="FastReports" />
 <meta name="keywords" content="" />
 <meta name="description" content="" />
 <link rel="stylesheet" href="stylesite.css" type="text/css" media="screen, projection" />
</head>
<body>
<div id="main">
 <?php
 include ("header.php");
 ?>
 <?php
 include ("reportslist.php");
 ?>

<script type="text/javascript" language="javascript">
function get(){
 var name = document.getElementById('reports').options[document.getElementById('reports').value].text
 document.getElementById('forFrame').innerHTML = '<iframe id="frame" src="https://localhost:44346/api/reports/Design?name='+name+'" width="1000" height="1000" />';
 };
</script>
<div id="forFrame"></div>
</div>
</body>
</html>
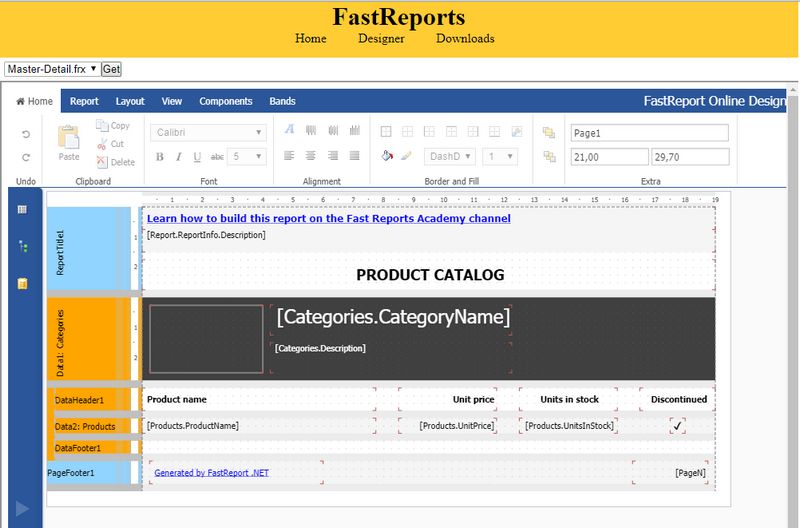
如您所见,html页面模板与index.php没什么不同。唯一的区别在于Get ()方法。我们从下拉列表中选择报表的名称。然后,在后端插入带参考设计方法的iframe。在参数中,我们传递报表的名称。结果,我们将看到类似于index的页面:

但是,如果我们单击Get ()按钮:

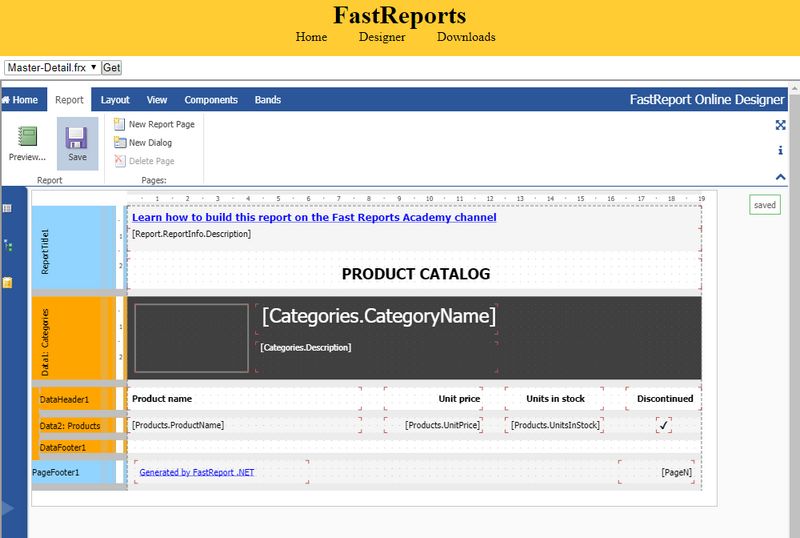
我们得到了一个带有已加载报表模板的设计器。我们可以对其进行编辑并保存:

绿色框中保存的消息将告诉我们报表已保存。
仍然需要执行第三页——下载。创建文件downloads.php:
<html>
<head>
 <meta http-equiv="content-type" content="text/html; charset=utf-8" />
 <title>FastReports</title>
 <meta name="title" content="FastReports" />
 <meta name="keywords" content="" />
 <meta name="description" content="" />
 <link rel="stylesheet" href="stylesite.css" type="text/css" media="screen, projection" />
</head>
<body>
<div id="main">
<?php
include("header.php");
?>
<?php
include("reportslist.php");
?>
<p>Please select report format:</p>
 <div>
 <input type="radio" id="pdf"
 name="r" value="pdf">
 <label for="pdf">pdf</label>

 <input type="radio" id="html"
 name="r" value="html">
 <label for="html">html</label>
 </div>
<script type="text/javascript" language="javascript">
function get(){
 var number = document.getElementById('reports').value;
 number++

 var type = '';

 if (number > 0)
 {
 var inp = document.getElementsByName('r');
 for (var i = 0; i < inp.length; i++) {
 if (inp[i].type == "radio" && inp[i].checked) {
 type = inp[i].value;
 }
 }
 var elem = document.createElement('a');
 elem.setAttribute('href','https://localhost:44346/api/reports/'+number+'?format='+type);
 elem.setAttribute('download', 'download');
 elem.click();
 }
}
</script>
</div>
</body>
</html>
除下拉列表外,页面模板还包含两个单选按钮:pdf、html。这是我们在后端实现的两种导出类型。这次的Get ()方法有很大的不同。我们将使用下拉列表中选择的报表的索引代替名称。在脚本中,我们创建<a>标记并将链接设置为后端,在此处使用WebApi以指定的格式获取索引报表。形成链接后,我们立即以编程方式单击它。因此,我们下载了文件。运作方式如下:

单击获取按钮。然后我们得到文件:

您可以像在第一页上那样在WebReport对象中显示报表,然后进行导出。下载“Downloads”页面显示了一种直接从服务器获取报表导出的替代方法。
本文总结了由PHP应用程序处理FastReport.Net报表的三个部分。
欢迎任何形式的转载,但请务必注明出处,尊重他人劳动成果
转载请注明:文章转载自:FastReport控件中文网 [https://www.fastreportcn.com/]
本文地址:https://www.fastreportcn.com/post/2474.html
 联系电话:023-68661681

 返回
返回